Tip - How to convert a XML file to filters in Advanced Find in Dynamics 365 (CRM)
XML file
For instance, if we’ve already got a XMl file like below,
<fetch version="1.0" output-format="xml-platform" mapping="logical" distinct="false"> <entity name="contact"> <attribute name="fullname" /> <attribute name="telephone1" /> <attribute name="contactid" /> <order attribute="fullname" descending="false" /> <filter type="and"> <condition attribute="firstname" operator="eq" value="alex" /> <condition attribute="mobilephone" operator="eq" value="619-555-0129" /> </filter> </entity></fetch>Convert the xml file to JavaScript string
Open the xml file using notepad++ or any other text and source code editor that you can get, then follow below steps:
- Press Ctrl + A on your keyboard to select the entire script
- Press Ctrl + J on your keyboard to change xml to a single string, and then assign it to a variable fetchxml (you can also use other name as long as it meet Naming and declaration rules for variables of JavaScript)
fetchxml = '<fetch version="1.0" output-format="xml-platform" mapping="logical" distinct="false"> <entity name="contact"> <attribute name="fullname" /> <attribute name="telephone1" /> <attribute name="contactid" /> <order attribute="fullname" descending="false" /> <filter type="and"> <condition attribute="firstname" operator="eq" value="alex" /> <condition attribute="mobilephone" operator="eq" value="619-555-0129" /> </filter> </entity> </fetch>';Convert JavaScript to filters in Advanced Find
- Open Advanced Find, and find the Contact entity (or the entity you’re looking for), then ensure there is no existing filters set up,

- Hit F12 on your keyboard
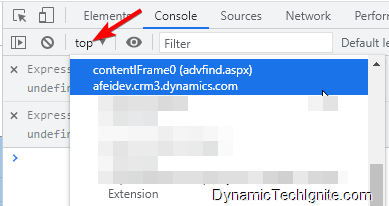
- Select the ‘contentIFrame0’ from the dropdown list as the red arrow shown on below snip

- Copy the variable and the value into the Console, hit Enter

Enter below magic script into the Console, and hit enter again,
$find(‘advFind’).set_fetchXml(fetchxml);

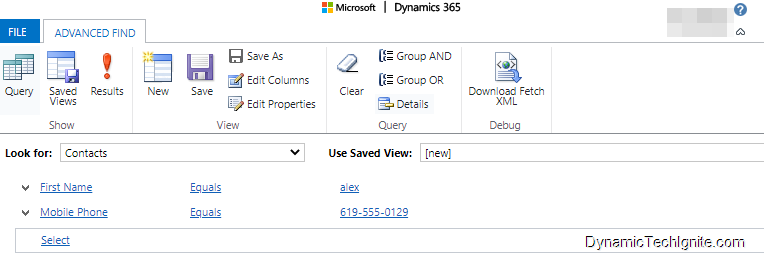
Bingo! you will see the filters in Advanced Find accordingly


0 comments:
Post a Comment