

How to customize the case resolution dialog
Customizing the case resolution dialog to suit the business needs, such as, adding fields like Resolution type, or removing fields like Remarks, if they don’t apply to your business scenarios. You can also create case resolution rules by adding custom status values. The following sections discuss the permissions you’ll need to modify the case resolution dialog and how to enable the option to customize dialogs in Customer Service Hub. You’ll also learn to customize the case resolution dialog and add custom case resolution rules using examples.
Note
The option to customize the case resolution dialog is also available in Dynamics 365 Customer Engagement (on-premises) 9.1. More information: New features in Dynamics 365 Customer Engagement (on-premises)
Check permissions
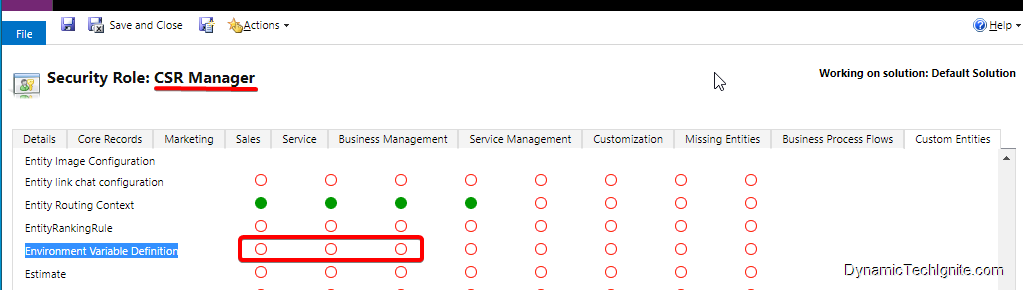
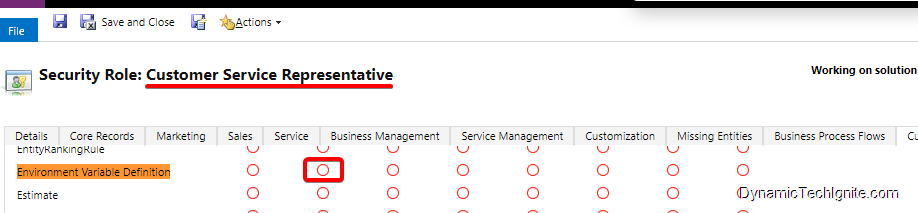
Make sure that the CSR Manager and Customer Service Representative security roles have the following permissions set for Environment Variable Definition:
- Customer Service Manager: Create, Read, and Write
- Customer Service Representative: Read
Note
If you’ve created custom security roles, you’ll need to update the roles before you can use the modified case resolution dialog.
Customize dialogs
By default, the style of the Resolve case dialog is set to standard dialog. You can, however, change the style to Customizable dialog so that you can add custom fields and values.
To enable the Customizable dialog option
- In Customer Service Hub, go to Service Management.
- In the site map under Service Terms, select Service Configuration Settings.
- In the Resolve case dialog section, select Customizable dialog from the dropdown list.
- Select Save.
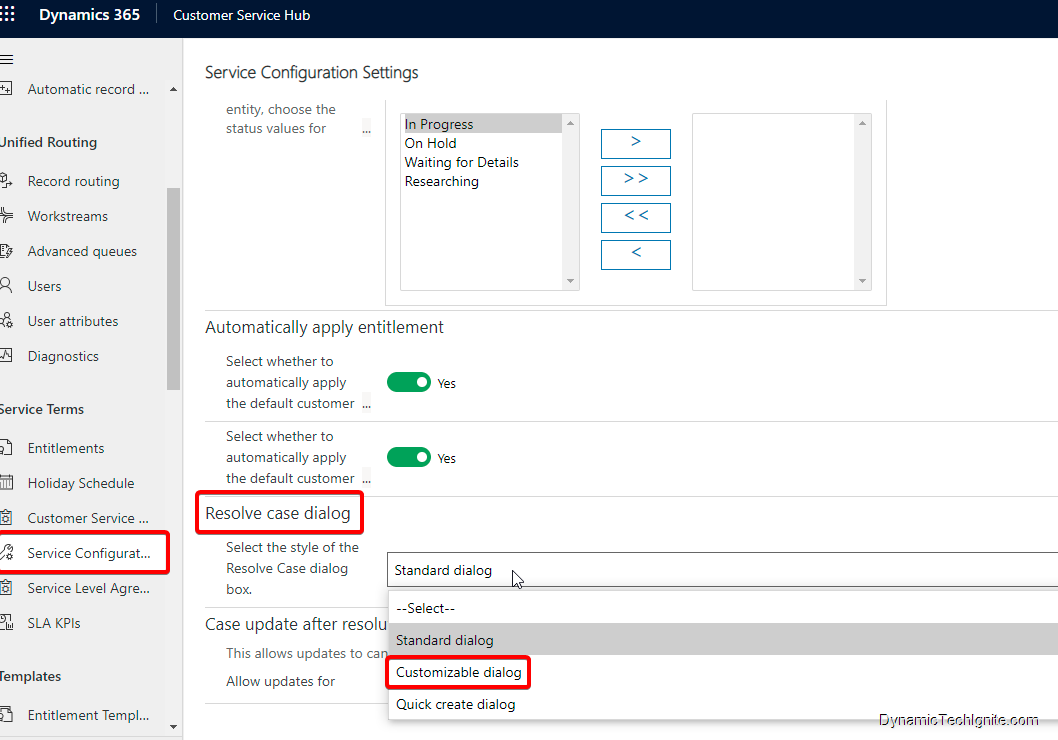
Note: there are actually two form types available (quick create and standard dialog). please note that you must choose which dialog you’d like to use first from the dropdown list, and save it; after that, you can change it to Customizable dialog. for example, if you try to customize the standard dialog, you must choose Standard dialog and save the change first, then change it to Customizable dialog, and save it again.
Note: at this moment, case resolution dialog can only be configured under the new interface. the classic(legacy) interface doesn’t support the modification of the case resolution dialog yet.
Add or remove fields from the case resolution dialog
You can modify the case resolution dialog and remove a field under the new unified interface rather than the classic interface, so that it no longer appears at runtime for the user.
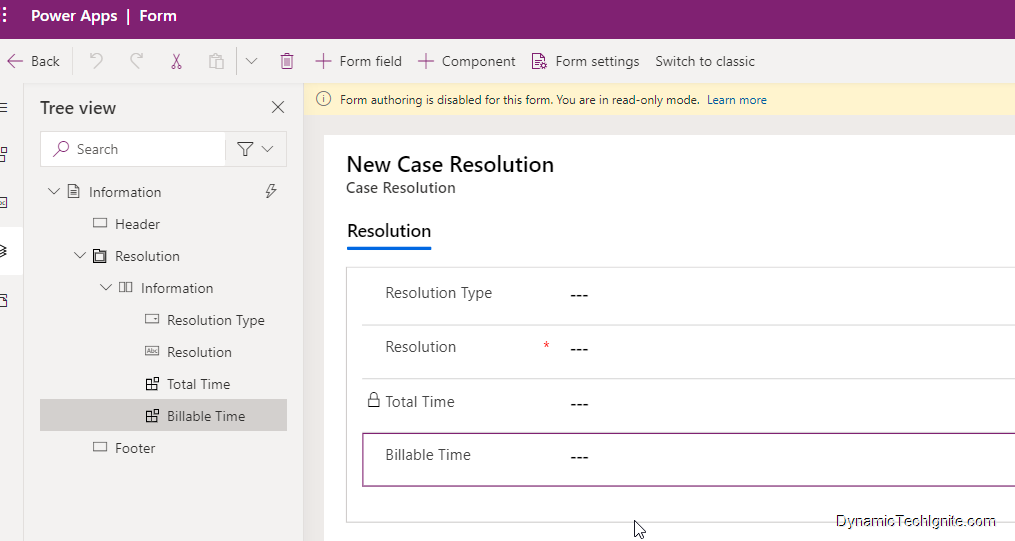
As an example, let’s see how to remove the Remarks field from the Information form.
- In Power Apps under the correct environment, navigate to and open the default solution, and search for Case Resolution table, and then select Forms.
- Open the form you want to edit. For this example, let’s select the Information form. The form opens in the form designer.
- In the form designer, do the following:
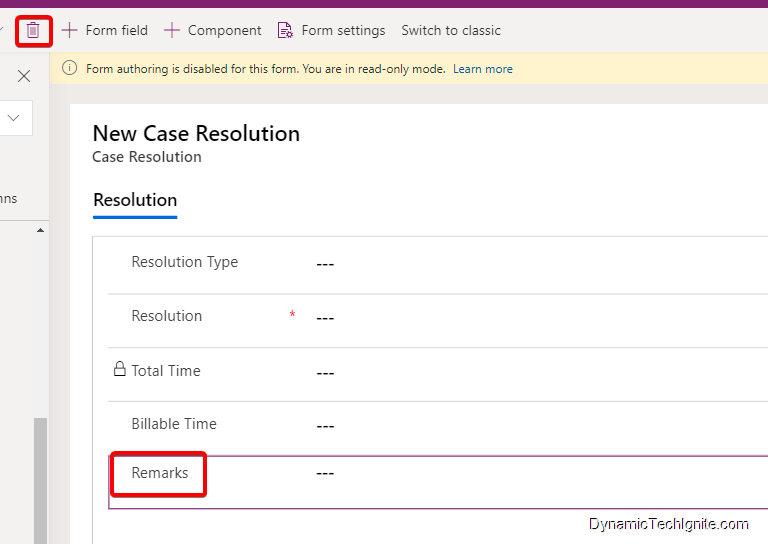
- Select Remarks.
- On the command bar, click on that Delete icon.
- Select Save, and then select Publish.
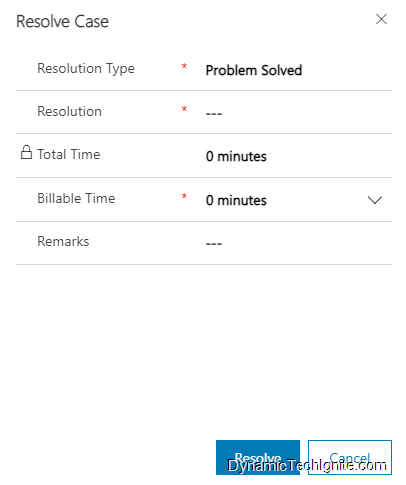
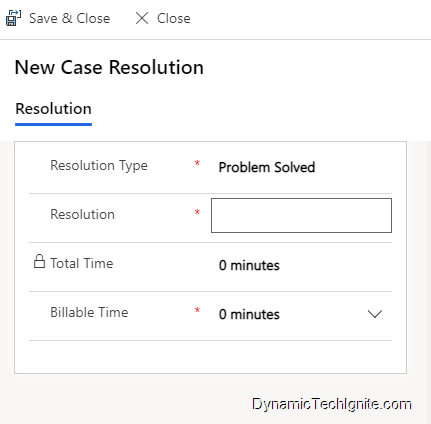
When the CSR manager or customer service representatives try to resolve a case, the case resolution dialog won’t display the field that you deleted. the dialog will look like below snap shot now.
0 comments:
Post a Comment