

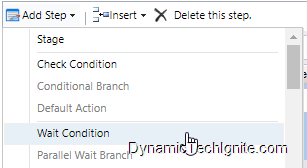
Use "Wait Condition" to delay workflow
Add Execution Time field to the form for comparison
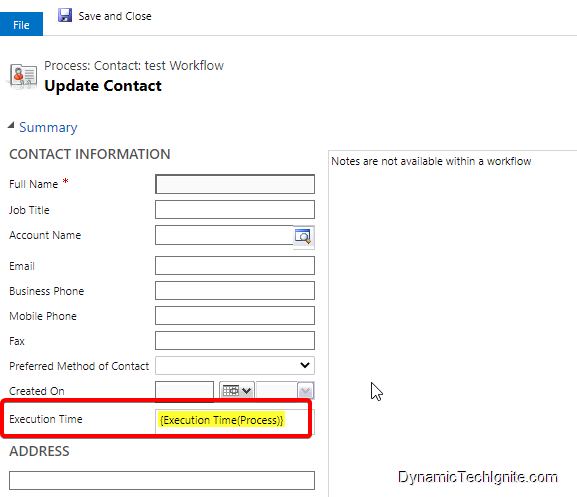
the workflow called Contact: test workflow is created as below snap shot shown

then, click on Set Properties to assign a dynamics value {Execution Time(Process)} to the newly added field called Execution Time for testing purpose. in order to compare with the timestamp when the contact record is created, I also add Created On field on the Contact form.
Execution Time in workflow
Step #1 Update the workflow by adding below condition to the flow:
If Contact:Created On on or after [ 5 Minutes Before Process-Execution Time], then:
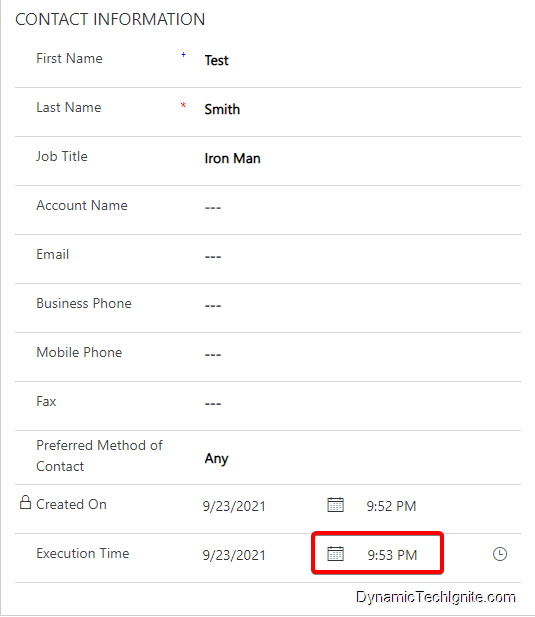
Update the Job Title field on the contact record as Iron Man

Once completing the set up, you can save and activate the workflow.
Step #2 create a new contact record
Go back to the unified interface and navigate to the Contact entity, and create a new contact record and save it. 1 min After the contact record is created, the workflow is triggered.
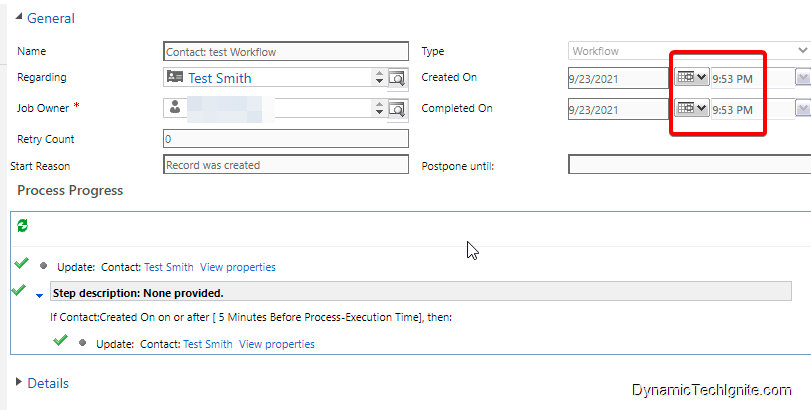
Step #3 check the Process session history of the workflow
Below graph will give you some rough idea about how the execution time works.
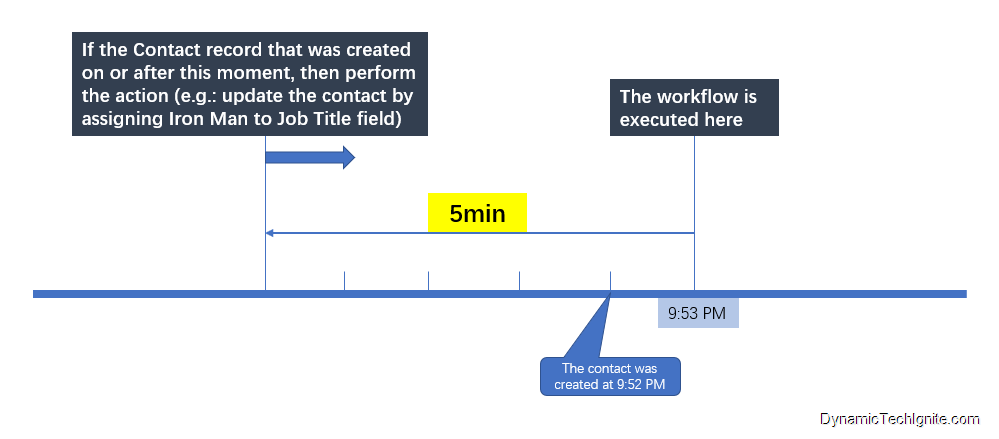
that’s the reason why the workflow is triggered and completed at the same time (sometimes, the workflow may be postponed based on the availability of the server resources).
Timeout in workflow
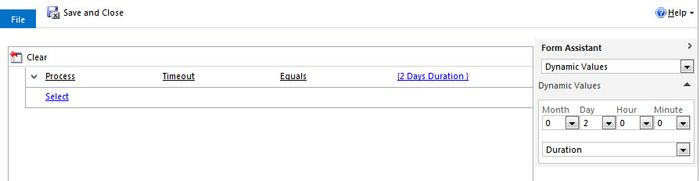
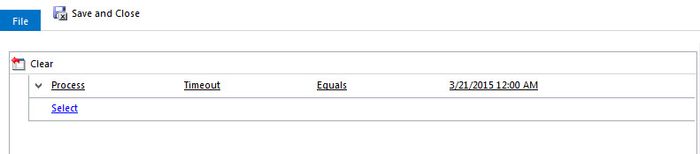
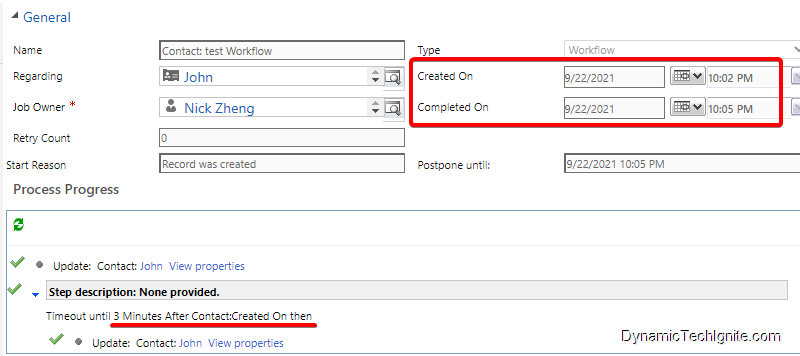
Local Values: Process -> Timeout -> Equals -> {3 Minutes After Created On} -> Save and Close
You can replicate Dynamics 365 Workflow Timeout wait condition in Power Automate flow as well.
Step #1 Configure the Wait Condition step using Timeout
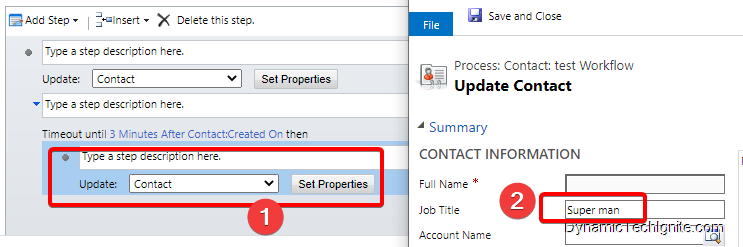
Updating the existing workflow by adding the Wait Condition step to this flow
then click on
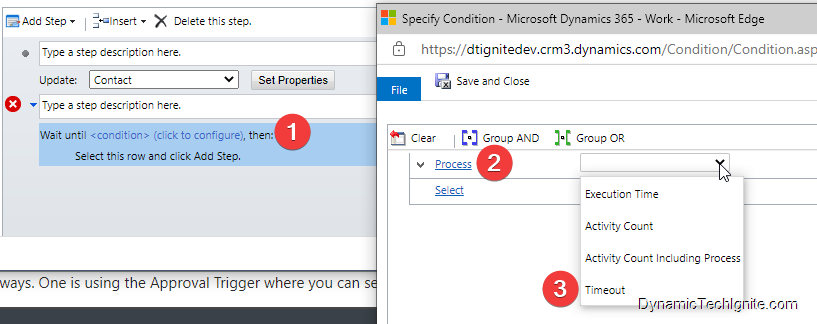
There are at least three ways to configure timeout:
- Wait for a specific amount of time
- Wait until a specific date
- Wait for a specific amount of time based on an existing date/time field

in order to validate the wait condition configuration, one more Update Record step is also added to the flow, then assign a static value called "Super man" to Job Title field for verification.
Step #2 Testing & Validation
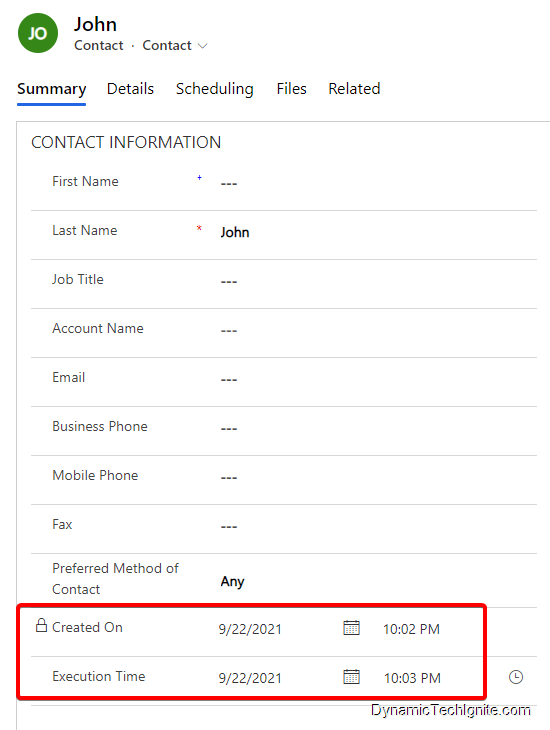
Create a new contact record, as we can see below in red rectangle, there is one minute delay (or may be even longer delay based on the availability of server resources) between Created on and Execution Time, because the workflow that is used to update the Execution Time field is a background workflow rather than real-time one.
when the contact is created, the workflow is triggered at the same time as well. then the workflow has to wait for 3min, and after 3min, the Job Title field will be updated.

While the ‘Wait conditions’ are useful in case of the timer related tasks which will be achieved with no coding, excessive use of wait conditions has a downside.
- Performance:
- Each waiting workflow instance carries performance overhead. The more waiting workflow you have, the more server resources will be consumed by the Asynchronous Processing Service.
- If you change the logic in your workflow and republish (like update the text of the email sent to your client), it does not change waiting workflow instances. For example, if you change the renewal email frequency to 15 days rather than 30 days, any workflow instances that are waiting will not be updated.
Activity Count & Activity Count Including Process
When designing workflows, it is possible to test the number of activities (open and closed) against a record (only activities that are regarding the record directly are counted).
The count is available under the Local Value – Process.
There are two activity counts – Activity Count and Activity Count Including Process.
Activity Count is a count of all activities (open and closed) excluding ones created by any workflow.
Activity Count including Workflow is a count of all activities (open and closed) regardless of how they were created.
It seems that the values for the activity counts are evaluated when the workflow starts or is paused and resumed or at the end of a wait. So a step like this to get a workflow to do something when an activity is added to a record does not work:
Wait until Process-Activity Count > some integer (or field with an integer)
However, if there is a parallel wait such as
Timeout until 4 hours
The wait branch with the activity count is re-evaluated and if the test on activity count is true the workflow follows that path rather than the timeout path. Most frustrating.
0 comments:
Post a Comment